Installing a security camera system doesn’t require a professional, and it shouldn’t. Today’s DIY security cameras are more affordable, easier to mount, and far more capable than systems from just a few years ago. Whether you’re protecting a front entrance, monitoring a backyard, or watching over a blind spot in your driveway, a well-placed camera serves as both a deterrent and a record if something goes wrong. This guide walks you through selecting the right system, gathering tools, and installing cameras that actually stay put and capture what matters.
Table of Contents
ToggleKey Takeaways
- DIY security cameras are affordable, easier to install, and give you full control over placement, storage, and access without monthly monitoring fees or contracts.
- Visible cameras act as a crime deterrent while providing documentation of package deliveries, maintenance visits, and incidents on your property.
- Choose between wired PoE cameras (rock-solid, no batteries, but requires conduit routing) and wireless WiFi cameras (faster setup, but dependent on signal strength and battery life).
- Mount entry cameras at eye level angled downward 15–20 degrees to capture faces clearly, and position perimeter cameras 8–10 feet high to cover full approaches while avoiding backlighting.
- Proper cable management with exterior-rated clips and silicone caulk sealing prevents water damage and ensures long-term reliability of your DIY security camera system.
- Start with one camera, test positioning for a few weeks, then expand your system as your needs and comfort level grow.
Why DIY Security Cameras Matter for Home Protection
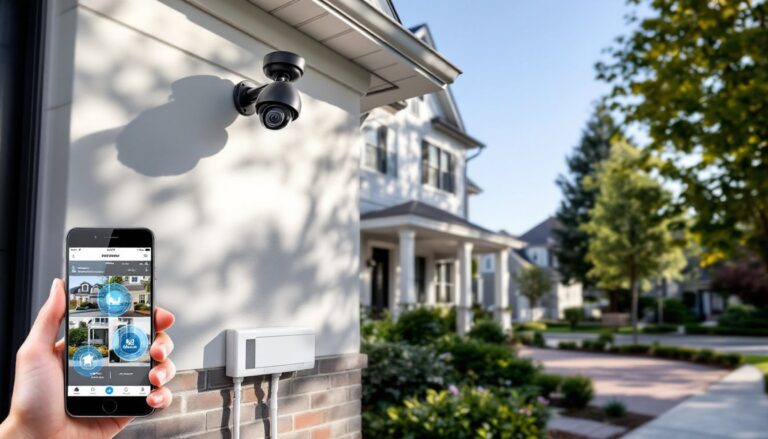
Security cameras aren’t just for catching thieves mid-crime. They deter break-ins in the first place, studies show visible cameras reduce property crime by a significant margin. Beyond theft, cameras log package deliveries, verify maintenance visits, and record accidents on your property. A homeowner can install their own system for a fraction of the cost of a professionally monitored setup, often in under a day.
Self-installed systems also mean you’re in control. You decide where cameras point, how footage is stored, and who has access. No monthly monitoring fees, no contracts, and no waiting for a technician. The trade-off is that you’re responsible for maintenance, updates, and ensuring your WiFi or wiring stays reliable. When done right, DIY installation is straightforward enough for anyone comfortable with basic tools and following a simple wiring diagram.
Choosing the Right Camera System for Your Needs
Before you buy a single camera, consider what you actually need to see. A doorbell camera at the front entrance has different requirements than a wide-angle camera covering a parking area or a narrow-focus camera watching a gate. Identify your coverage zones, estimate the distance from camera to subject (people should be recognizable at typical distances), and decide whether you need night vision.
Resolution and frame rate matter. 1080p (Full HD) is the practical minimum for recognizing faces: 2K or 4K gives you more detail and crops well if you’re zooming into footage. 30 fps (frames per second) is standard: jump to 60 fps only if you’re capturing fast motion and have the storage bandwidth. Cloud storage, local NAS (network-attached storage), or microSD cards each have trade-offs in cost, privacy, and accessibility.
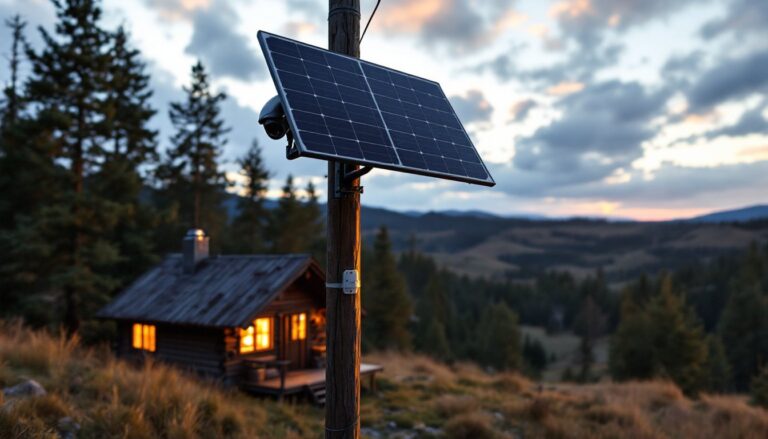
Power source also drives your choice. PoE (Power over Ethernet) cameras run on one cable carrying both power and data, cleaner and more reliable. Wired systems require conduit and routing but won’t drain batteries. Wireless cameras use WiFi and batteries, making them easier to install but requiring regular charging or battery swaps.
Wired vs. Wireless Options
Wired cameras deliver power and video through a single PoE Ethernet cable to a switch or recorder. No batteries to replace, no WiFi dependence, and zero latency. Installation means running conduit through walls or attics, drilling holes, and hiding cables, plan for at least an afternoon on routing alone. Wired systems are rock-solid for permanent installations.
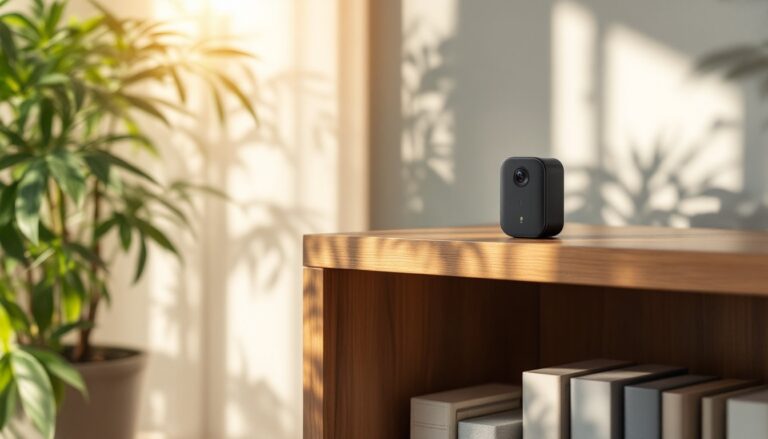
Wireless cameras connect via your home WiFi network. Setup is faster, mount the camera, connect it to the app, and you’re done. The catch is that your WiFi must be strong in that location (check signal strength with your phone first), batteries run down in months, and video quality depends on your internet bandwidth. Wireless shines for renters, temporary monitoring, or locations too awkward to run cabling.
Many homeowners hybrid approach it: wired cameras on fixed points like entry doors and driveways, wireless backup cameras in less critical spots. Wireless Security Systems: Unlock offer flexibility when you’re deciding between the two.
Essential Tools and Materials You’ll Need
For Wired PoE Installations:
• PoE Ethernet cables (Cat6 or Cat6a, solid-core, not stranded, solid core runs straighter through conduit)
• PoE Ethernet switch (a device that powers and communicates with all cameras)
• Network video recorder (NVR) or PC running camera management software
• Conduit (PVC or flexible, sized for cable bulk)
• Wall plates, connectors, and cable clips
For Wireless Installations:
• Cameras (battery or solar-powered)
• WiFi access point or extender (if your router is too far away)
• Rechargeable batteries or solar panels (depending on the camera)
Tools for Both:
• Drill (corded for sustained use, cordless for quick pilot holes)
• Bits (masonry for brick/concrete, spade bits for large holes)
• Drywall saw or hole saw (to cut clean openings in siding or fascia)
• Stud finder (verify wall structure before drilling)
• Level (cameras must be level or software’s digital level looks off)
• Tape measure (verify coverage angles and cable runs)
• Screwdrivers (Phillips and flathead: many brackets use #10 or #12 screws)
• Wire strippers and crimpers (if terminating cables yourself)
• Safety glasses and work gloves
Popular Mechanics and similar resources often cover the finer points of drilling techniques and tool selection for outdoor installations.
Step-by-Step Installation Process
1. Assess and plan your layout. Walk your property at dawn and dusk. Note blind spots, approach routes, and potential obstacles (tree branches, reflections, glare from streetlights). Mark camera positions with tape or chalk on walls and fascia. Take photos from each vantage point and look at the image on your phone to confirm coverage.
2. Test WiFi or plan cable runs. For wireless cameras, walk to each location with your phone and check signal strength. Aim for at least three bars: if you’re getting one bar, install a WiFi extender or use a wired camera instead. For wired systems, measure and plan your cable routes. Avoid running cables through walls shared with HVAC or electrical, stick to external conduit or the attic. Run extra cable for future expansion (it’s cheap now, expensive later).
3. Mount the bracket. Most cameras include a wall-mount bracket that accepts the camera head. Position the bracket and use a stud finder to check for studs or solid backing behind siding. Drill pilot holes (slightly smaller than your screws) to prevent wood splitting. Use corrosion-resistant screws (stainless steel or galvanized) rated for exterior use. For brick or concrete, use plastic anchors and masonry fasteners.
4. Run power and data. Wired installations require running cable through conduit. Feed PoE cable from your recorder/switch location to each camera position, leaving 3–4 feet of slack at each end. Avoid sharp bends (use cable guides or clips at corners). Terminate cables with RJ45 connectors and test continuity with a cable tester before connecting cameras.
5. Mount the camera to the bracket. Most cameras slide or screw onto the bracket. Ensure it’s level before tightening fully. Adjust the camera angle and focus distance according to the manufacturer’s settings.
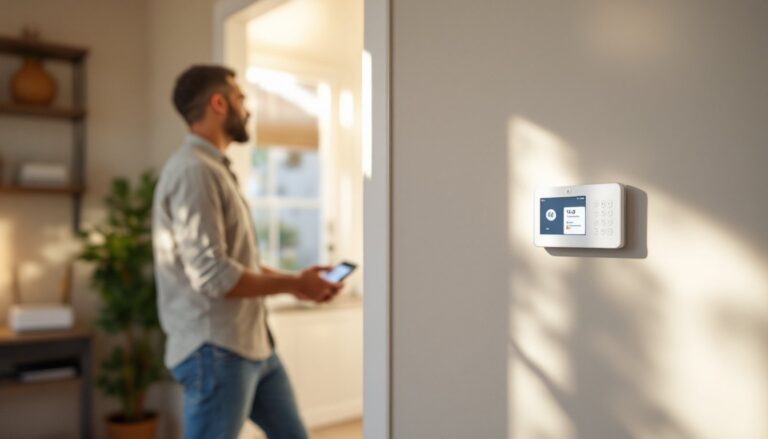
6. Power on and configure. For wireless, open the app and follow the pairing process. For wired, plug cables into the PoE switch and monitor the recorder to confirm video feeds. Set recording schedules, motion detection zones, and storage options in the management software.
Positioning and Mounting for Maximum Coverage
Camera height and angle make or break usable footage. Mount doorbell and entry cameras at eye level or slightly above (5–6 feet), angled downward at 15–20 degrees so you capture faces clearly. A camera pointing straight down catches only the top of people’s heads.
Driveway and perimeter cameras work best mounted 8–10 feet high on a soffit, fascia, or pole. This height covers the full approach and reduces glare from low-angle headlights. Aim the camera to capture the widest useful view without excessive barrel distortion at the edges.
Avoid mounting directly into afternoon or morning sun. Backlighting washes out faces. If sun angle is unavoidable, position the camera so its field of view points away from direct sunlight, or install a small sun hood (a 6–8 inch overhang) above the camera.
Test night vision and motion sensitivity. Wait until dark and have someone walk the property while you monitor footage on your phone. Adjust sensitivity to catch motion without triggering on tree branches or traffic reflections. Digital Trends covers recent smart home camera advances if you’re curious about the latest night vision and AI detection features.
Secure cables against weather. Use cable clips rated for exterior use, spaced every 2–3 feet along the run. Don’t rely on tape alone, UV breaks it down in months. Seal cable entry points into walls or conduit with silicone caulk to prevent water ingress. Best Home Security Camera guides often highlight how cable management affects long-term reliability.
Plan for maintenance access. Mount cameras where you can reach them with a ladder for cleaning and servicing. Dirt and spider webs degrade night vision fast. A quarterly clean with a soft cloth and mild soap does wonders.
Conclusion
A DIY security camera system puts real protection in your hands without the cost or complexity of professional installation. The key is honest assessment of your needs, careful positioning, and solid mounting technique. Spend extra time on planning and cable runs, those are the steps most DIYers rush and later regret. Start small if you’re unsure: install one camera, live with it for a few weeks, then expand. Your system will evolve as your property and comfort level change.