When it comes to protecting your home without very costly, Annke security cameras have earned a solid reputation among homeowners and DIY enthusiasts. These systems offer a practical balance of affordability, ease of installation, and genuine security features that actually work. Whether you’re watching over a single entry point or securing your entire property, Annke delivers dependable surveillance without the premium price tag of enterprise-grade systems. This guide walks you through what makes Annke cameras a smart choice, how to set them up yourself, and how to pick the right system for your specific needs.
Table of Contents
ToggleKey Takeaways
- Annke security cameras provide affordable, reliable surveillance without recurring subscription fees or expensive installation charges, making them ideal for budget-conscious homeowners.
- Video resolution matters: 1080p works for close-range identification, while 2MP to 5MP cameras offer wider coverage, and 4K systems deliver exceptional detail for zooming into license plates and facial features.
- Night vision with infrared LED technology and smart motion detection filters false alerts from branches and shadows, ensuring you only receive notifications about actual threats.
- Wired PoE systems outperform wireless options for permanent outdoor coverage, eliminating battery replacement and WiFi connectivity issues with a single cable carrying both power and video signal.
- DIY installation is straightforward if you plan cable runs carefully, use proper safety practices, and follow Annke’s intuitive app setup, allowing most homeowners to complete a two-camera system in under an hour.
- Choose your Annke system based on property size (1-8 cameras), internet setup, and storage needs, with mid-range two to four-camera setups ($300-$600) delivering excellent value for most homes.
What Makes Annke Cameras Stand Out for Homeowners
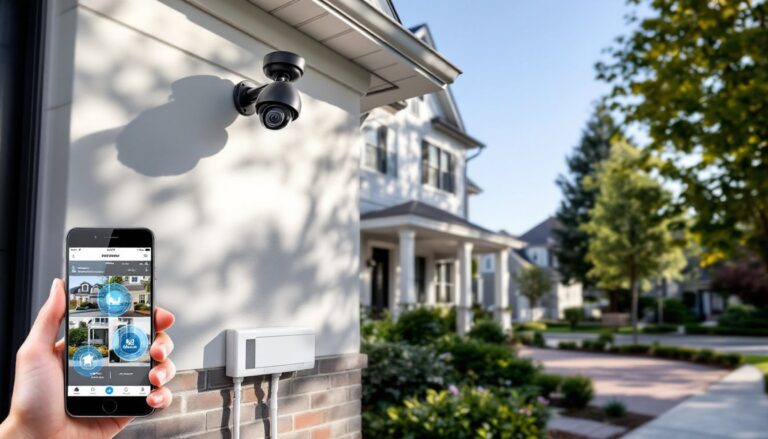
Annke carved out its niche by focusing on what homeowners actually care about: reliable surveillance at prices that don’t require financing. Unlike enterprise security vendors that bundle software licenses, installation fees, and monthly monitoring into eye-watering contracts, Annke keeps things straightforward. You buy a system, you install it, you own it, no recurring service charges or proprietary cloud subscriptions forced into your budget.
The brand prioritizes user-friendly design without dumbing down features. Their cameras and DVR/NVR systems ship with clear instructions, intuitive mobile apps, and support resources that don’t assume you’re an electrician. That matters when you’re running cable through walls on a Saturday afternoon and need quick answers. Products like their 4K PoE (Power over Ethernet) camera systems appeal to homeowners who want professional-grade image quality without renting professional installation crews.
Durability is another selling point. Annke cameras use weatherproof housings rated for moisture, temperature extremes, and UV exposure, the kinds of conditions your porch, garage, or backyard faces year-round. The hardware is designed to keep working through seasons, not just through summer. When you compare Annke’s feature set to competitors in the same price range, you’re usually getting more resolution, better night vision capabilities, and longer-term reliability.
Key Features That Deliver Real Value
Video Quality and Resolution Options
Annke offers cameras across a range of resolutions, from 1080p (1920 × 1080 pixels) up to 8MP (megapixel) and 4K systems. Here’s what that means in practice: at 1080p, you’ll clearly identify a person’s face from about 10–15 feet away on a typical driveway. Bump up to 2MP (1920 × 1200) or 5MP, and you get wider field coverage with better detail at distance, useful for monitoring longer driveways or back corners. 4K systems deliver exceptional clarity and are worth the investment if you need to zoom in and still see fine details like license plates or facial features.
The sensor types matter too. Annke uses CMOS sensors (not the older CCTV CCD technology) that handle compression better and produce less visual noise in footage. This translates to video that stays sharp and readable, even when saved to storage. If you’re planning to review footage later or need clips for insurance or law enforcement, image clarity directly affects whether that video is actually useful.
Field of view ranges from 90° to 120° on most models, which sounds technical but simply means how wide the camera “sees.” A 90° view suits narrow spaces (like a side gate), while 120° covers a broader area and reduces blind spots on open porches or garage doors.
Night Vision and Smart Detection
This is where budget systems often fail, but Annke doesn’t cut corners. Their cameras use infrared (IR) LED technology to see in complete darkness, no visible light needed. The range typically extends 30–100+ feet depending on the model, though higher-end systems go further. That means your camera keeps watching after sunset without relying on nearby lights.
Smarter still, many Annke cameras include motion detection that filters out false alerts from swaying branches, shadows, or passing cars. Advanced models add person detection and vehicle detection, which uses AI to distinguish between a person walking across your lawn versus leaves blowing. That’s not just a feature, it’s the difference between a system that spams you with 50 useless notifications a day and one that alerts you to actual threats.
Another practical feature: smart recording modes that only save video when motion is detected or during specific times. This conserves storage space dramatically. On a 2TB hard drive, you might store weeks of motion-triggered footage instead of just days of continuous recording. When paired with a decent internet connection, you can also stream live video from your phone or tablet, helpful if you’re at work and want to check if a package arrived or if someone’s lingering near your door.
Installation and Setup: DIY-Friendly Options
Annke cameras come in two main flavors: wireless/WiFi models and wired PoE systems. Wireless is fast, mount the camera, connect it to WiFi, and you’re running. The tradeoff: batteries need recharging every few months (depending on usage and temperature), and WiFi coverage must reach the camera location.
Wired PoE systems require running an Ethernet cable from the camera back to the NVR (network video recorder) unit, typically in your garage, basement, or closet. That sounds tedious, but PoE is worth the effort. A single cable carries both video signal and power, so you only drill one hole instead of two. No batteries to swap, no WiFi dropouts. For permanent, reliable coverage, especially outdoors, PoE beats wireless every time.
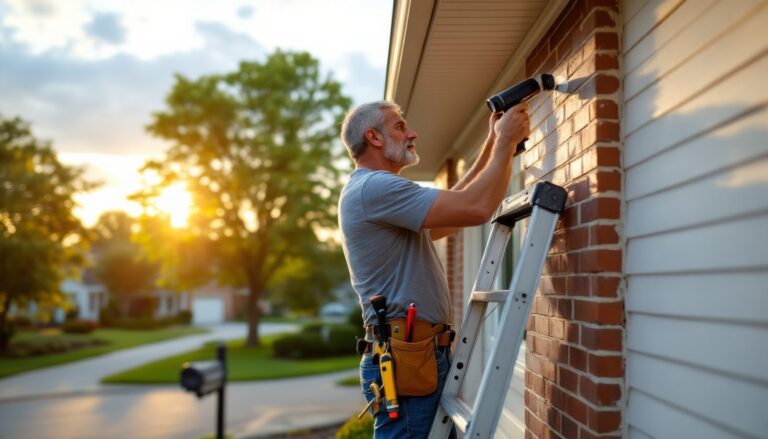
Installation itself is straightforward if you follow these basics: Plan your cable run first. Measure the distance from camera to NVR and think about routing through walls, under eaves, or along gutters. Existing conduit is your friend: new holes should be sealed with caulk to prevent water intrusion. Use a stud finder and drywall anchors or masonry bits (depending on your surface) to mount the bracket securely, cameras hang heavy when they’re weather-resistant aluminum housings.
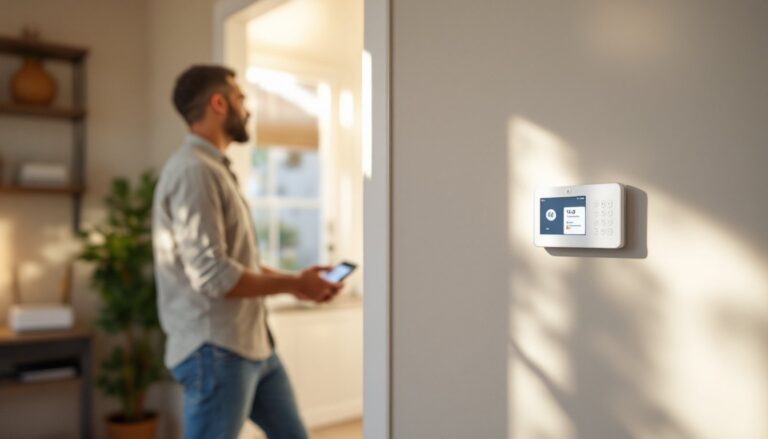
Once mounted, connect the Ethernet cable and power up the system. The NVR usually ships with a hard drive installed, but verify capacity before setting it up. A 2TB drive stores roughly 7–10 days of continuous 1080p recording, longer if you’re using motion-triggered recording. The Annke app walks you through network setup: if you hit snags, support forums and YouTube have walkthroughs for almost every model variation. Most homeowners finish a two-camera install in under an hour, assuming cable routing is straightforward.
One safety note: use proper eye protection and gloves when handling tools and drilling. Secure your ladder on level ground, and don’t stretch awkwardly to reach mounting points, reposition the ladder instead. If running cable outdoors requires working at height or near roof edges, consider bringing in a second pair of hands or hiring a pro for that portion.
Choosing the Right Annke System for Your Home
Start by mapping your property and identifying what you actually need to monitor. A small apartment entryway is a one-camera job: a house with multiple doors, a driveway, and a yard might need four to eight cameras. Don’t overbuy, extra cameras multiply installation work, storage costs, and the mental fatigue of reviewing footage.
Budget matters, and Annke systems range from roughly $150 for a single WiFi camera up to $800+ for a full PoE system with four 4K cameras and an NVR. Mid-range systems, say, a two to four-camera PoE setup with 2MP or 5MP resolution, typically run $300–$600 and deliver excellent value. They handle most home security needs without overspecifying.
Consider your internet setup. If you rely on a single WiFi router in the front of the house and want to monitor the backyard, a wired PoE system is more stable. Conversely, if you rent and can’t run cables, wireless is your solution, though you’ll manage batteries and potential connectivity gaps.
Think about storage too. Local storage on the NVR is the most reliable option (no subscription fees, no cloud dependency), but it requires a reasonably sized hard drive. Many homeowners start with 2TB and upgrade later if they find they need to retain footage longer. Check Annke’s storage calculator on their website, it takes resolution, frame rate, and recording mode into account.
Before purchasing, read independent reviews on CNET and Tom’s Guide to see real-world testing and comparisons with other budget brands. Check whether the system you’re considering integrates with your existing smart home setup (Google Home, Alexa, etc.). Also confirm that your region and local codes don’t impose restrictions on camera placement, some HOAs or municipalities have rules about where you can point cameras or whether they require visible warning signage. It’s easier to check this before installation than after.
Conclusion
Annke security cameras deliver reliable surveillance for homeowners who want protection without premium pricing or locked-in contracts. The combination of solid build quality, practical features like smart detection and quality night vision, and straightforward DIY installation makes them a smart choice for securing your property. Pick the right configuration for your layout, follow basic installation practices, and you’ll have a dependable security system running for years. For more detailed comparisons and model reviews, explore comprehensive home security camera buying guides on our site.