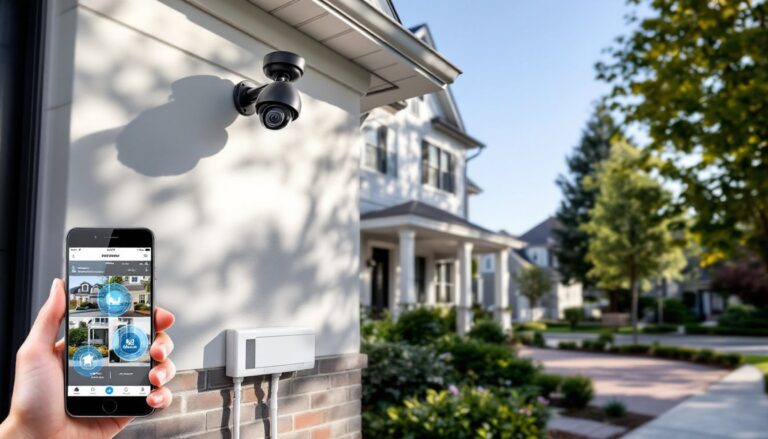
Solar panel security cameras are transforming how homeowners protect their properties without running electrical lines or worrying about drained batteries. Unlike traditional wired systems or battery-dependent cameras that need frequent recharging, solar-powered models tap into free energy from the sun, delivering continuous surveillance year-round. Whether you’re securing a remote gate, monitoring a detached garage, or keeping an eye on your front entrance, these wireless outdoor cameras eliminate the need for electricians, trenching, or complicated power management. This guide walks you through everything you need to know to select, install, and maintain a solar panel security camera system that actually works.
Table of Contents
ToggleKey Takeaways
- Solar panel security cameras eliminate costly electrical installation by tapping into free solar energy, saving homeowners $500–$1,500 in electrician and trenching costs.
- A well-sized solar panel (2–4 watts) paired with a 1,200–5,000 mAh lithium-ion battery keeps your security camera running 24/7 year-round, even in cloudy climates.
- Choose a solar security camera with 2K resolution and IP65/IP66 weatherproofing for reliable operation, and prioritize field of view based on whether you’re monitoring a driveway or a specific entry point.
- Position the solar panel to receive 4–6 hours of unobstructed direct sunlight daily at a 30–45° angle toward true south to maximize power generation.
- Clean the solar panel and camera lens quarterly and monitor battery health through your app to prevent the most common failure points and extend system reliability.
- Verify WiFi signal strength (-70 dBm or stronger) before permanent installation and weatherproof all cable connections with silicone caulk and stainless steel hardware to avoid moisture damage.
Why Solar-Powered Security Cameras Are a Game-Changer for Homeowners
Solar panel security cameras solve a fundamental problem: most homes have blind spots that are a nightmare to power. Running electrical conduit to a detached shed, a side yard, or a driveway entrance means trenching, permits, and hiring a licensed electrician, costs that easily climb to $500–$1,500 just for the wiring. Battery-powered cameras, meanwhile, demand monthly or quarterly recharging, and they’ll eventually fail at exactly the moment you need them most.
A solar-powered system keeps the camera running 24/7 with zero grid power and minimal ongoing maintenance. During the day, the solar panel charges an integrated or external battery: at night, that stored energy powers the camera and its connectivity. In most climates, including cloudy regions, a well-sized solar panel and battery combo keeps the system operational year-round. You also avoid the liability of running high-voltage exterior wiring near walkways or landscaping, and you skip the electrician permit process entirely in most jurisdictions.
Another win: flexibility. Because there’s no power cord, you can reposition the camera seasonally, move it to a new trouble spot, or pack it up if you relocate. For renters or homeowners hesitant about permanent installations, that freedom is invaluable. Security professionals on sites like HomeAdvisor often recommend solar cameras for properties with difficult-to-wire locations or as an entry point into whole-system monitoring.
How Solar Panel Security Cameras Work
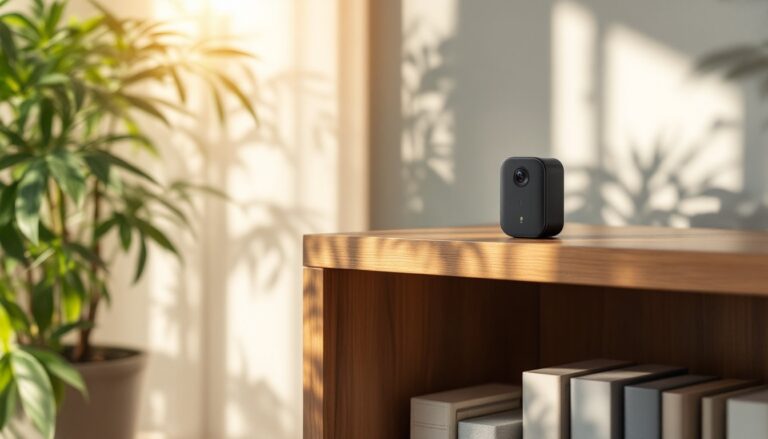
At its core, a solar panel security camera is a standard IP security camera with a solar panel and battery pack bolted on. The camera captures video using a sensor and lens, compresses and streams or stores the footage via WiFi or cellular data, and relies entirely on the solar-battery combo for power.
Here’s the workflow: the solar panel (typically 2–4 watts) collects sunlight and charges a rechargeable battery, usually lithium-ion or lithium-polymer, rated for 1,200–5,000 mAh depending on the model. That battery supplies power not just to the camera’s sensor and infrared LEDs but also to the WiFi module and any smart features like person detection or two-way audio. Even in winter or cloudy climates, the solar panel generates enough trickle charge to keep the battery topped up, as long as the camera isn’t running continuous high-bitrate recording.
Power Supply and Battery Systems
Battery capacity is the most critical spec you’ll evaluate. A 5,000 mAh lithium-ion battery in a moderately busy location (let’s say a driveway with activity from 7am to 7pm) will typically survive 2–4 days of cloudy weather without solar input. In harsh winter climates with extended cloud cover, you may see the system drop to “low-power mode,” where it records lower resolution or less frequently to stretch battery life.
Two battery architectures dominate the market. Integrated batteries are built into the camera body, convenient, cleaner look, but you can’t swap in a larger battery for seasonal adjustments. External battery packs strap to a nearby surface (fence post, wall) and connect via cable, allowing you to upsize if you’re in a harsh climate or upgrade independently. External setups also let you add a second battery pack for redundancy. Check your camera’s manual for the minimum battery capacity recommended for your climate zone: undersizing here is the #1 reason solar cameras fail.
Key Features to Look For When Choosing a Solar Camera
Not all solar security cameras are created equal. Before you buy, prioritize the specs that matter for your specific location and use case.
Wattage and efficiency of the solar panel directly impact how much charge you accumulate on cloudy days. A 4-watt monocrystalline panel generates more power per square inch than a cheaper 2-watt polycrystalline panel, especially in weak winter sunlight. If you’re in the Pacific Northwest or another overcast climate, that extra wattage is worth the upfront cost. Tech reviewer sites like CNET routinely test solar panel efficiency claims in real-world conditions and are worth consulting.
Field of view (FOV) and focal length determine what you’re actually watching. A 130–160° wide FOV covers a driveway or entrance effectively: a narrower 70–90° FOV zooms in on a specific spot. Wide angles are great for general awareness but sacrifice detail: narrower fields catch license plates or faces better. Match the FOV to your threat model, a front-door camera should be broader: a gate camera can be narrower and positioned farther away.
Weatherproofing is non-negotiable. Your camera sits outside year-round in rain, frost, heat, and dust. Look for IP65 or IP66 ratings, which means dust-sealed and protected against water jets. Cheaper models at IP54 survive rain but aren’t ideal for coastal salt spray or extreme conditions. The solar panel connection point is a weak link for water infiltration: inspect the connector design and ensure the cable has a weatherproof strain relief.
Resolution, Night Vision, and Smart Connectivity
A 1080p (2 MP) camera is the entry-level standard and streams fine over slower WiFi links: 2K (4 MP) or 4K (8 MP) provides more clarity for facial recognition or license plate detail, but demands more bandwidth and battery power. For a driveway or perimeter, 2K is the sweet spot, clear enough to identify people, not so demanding that it drains the battery on cloudy days.
Infrared (IR) night vision range matters enormously. Most solar cameras use 850 nm or 940 nm IR LEDs: the stated range (“see 30 feet in the dark”) is often marketing exaggeration. Realistically, expect usable monochrome IR footage out to 20–25 feet. If you need color night vision, some premium models use a low-light CMOS sensor plus passive illumination, which costs more but eliminates the eerie IR glow that can tip off intruders.
WiFi connectivity should include 2.4 GHz and 5 GHz bands: 2.4 GHz has better range through walls, while 5 GHz is faster if your router is nearby. Some solar cameras add 4G/LTE cellular backup (requires a SIM card and monthly plan), which is a lifesaver if your WiFi drops. Verify that the camera’s app supports person detection and AI filtering, so you don’t waste battery power uploading countless clips of blowing leaves. Tom’s Guide publishes detailed comparisons of solar camera smart features, including notification accuracy and app responsiveness.
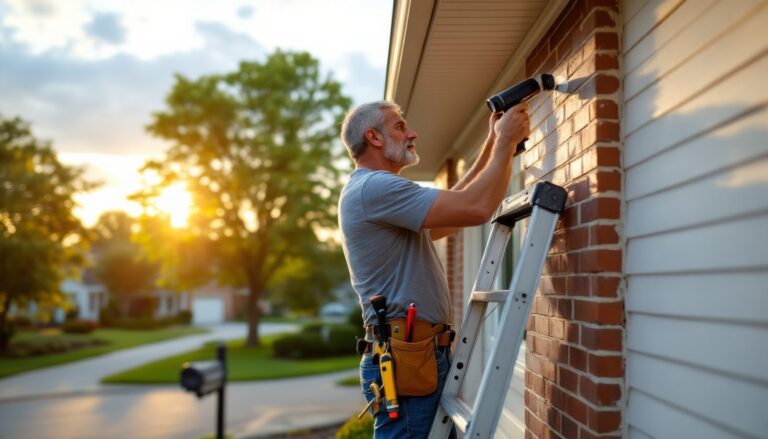
Installation and Placement Tips for Maximum Efficiency
Where you position the camera and solar panel is just as important as which model you buy. Poor placement will leave you frustrated and asking why the battery dies every other week.
Sun exposure is paramount. The solar panel needs at least 4–6 hours of unobstructed direct sunlight daily to maintain charge in temperate climates. In far northern regions or during winter months, plan for 3–4 hours minimum. Shade from trees, overhangs, or neighboring structures cuts generation by 50–80%: if your ideal camera location sits under an eave or tree, consider moving the solar panel to a nearby sunny spot (roof corner, fence post) and running the power cable 10–15 feet to the camera body.
Angle the panel toward true south (in the Northern Hemisphere) at a tilt of 30–45° from horizontal, depending on your latitude. Most solar security cameras come with an adjustable bracket: don’t just slap the panel flat against a wall. A properly angled panel generates 20–30% more power than a flat one, especially in winter when the sun is lower.
Height and aiming for the camera itself depends on your purpose. A front door camera typically mounts 6–8 feet high so viewers don’t look up your nose: a driveway camera can be 8–10 feet up on a garage or fence post to capture approaching vehicles or people. Aim slightly downward so the sun doesn’t wash out the lens during midday or cause glare off wet surfaces.
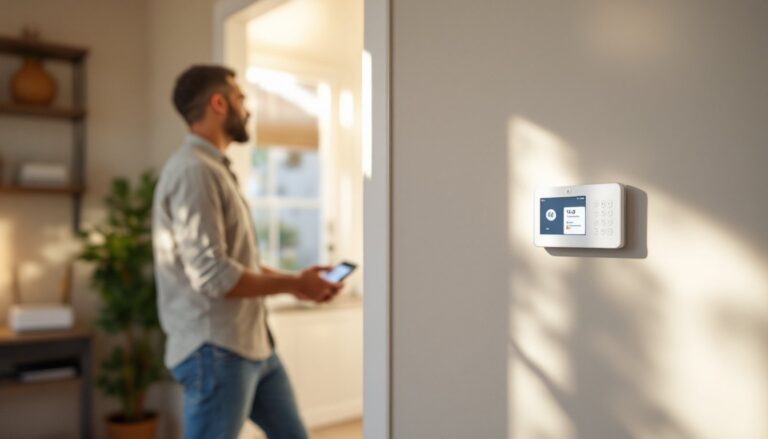
Test WiFi signal strength at the installation location before mounting anything permanently. Most solar cameras need a -70 dBm signal or stronger (closer to -50 dBm is ideal). If you’re far from your router, consider a WiFi extender or mesh system. Remember: running an ethernet cable to power a WiFi extender defeats the whole purpose of going wireless: plan your mesh network before installation.
Weatherproofing the connections requires attention. Use stainless steel bolts and washers to mount brackets (not aluminum, which corrodes in salt spray). Seal any cable entry points with silicone caulk or waterproof electrical tape. The battery and solar panel connection points are the most vulnerable: some users wrap the connector with a zip-lock bag as a secondary moisture barrier if they’re in a harsh climate.
Avoid pointing the camera directly at reflective surfaces, windows, water, or white walls bounce sunlight directly into the lens and blind the sensor. If you must position near a reflective surface, angle it off-axis slightly or add a sunshade ring.
Maintenance and Troubleshooting Your Solar Security System
A solar camera is lower-maintenance than a wired system, but it’s not completely hands-off. Commit to a simple seasonal routine and you’ll avoid 90% of field failures.
Quarterly cleaning is the biggest payoff for minimal effort. Dust, pollen, bird droppings, and water spots accumulate on the solar panel and lens, reducing light transmission and image clarity by 15–40%. Every three months (or after a dust storm or heavy pollen season), wipe the panel and lens with a soft, dry microfiber cloth and, if needed, a little distilled water. Don’t use tap water, minerals can leave streaks. For the camera lens, avoid abrasive materials: a single scratch ruins image quality. If algae or mineral deposits build up in humid or salty climates, a very dilute solution of white vinegar (1:10 ratio with distilled water) on a cloth works: don’t spray it directly on electrical connections.
Monitor battery health through the app if your camera provides a battery percentage readout. If the battery regularly drops below 10% during nighttime hours (even in summer), your solar panel isn’t generating enough power. Move the panel to a sunnier spot, increase its tilt angle, or clear nearby shade-makers. If the camera chronically dies after 3–4 years, the battery may be degraded and requires replacement (typically $30–$80 for an aftermarket pack).
Cold-weather considerations: lithium batteries have reduced capacity in freezing temperatures. A battery rated for 5,000 mAh at 70°F might deliver only 3,000 mAh effectively at 20°F. In harsh winters, expect reduced recording hours or lower resolution. Some users wrap external battery packs with foam insulation or relocate them to a slightly warmer location (garage wall instead of exposed fence post) to compensate.
WiFi and connectivity troubleshooting: if the camera disconnects frequently, first reboot the router and camera (unplug for 30 seconds). If the issue persists, check that your router’s 2.4 GHz band isn’t set to a crowded WiFi channel. Apps like WiFi Analyzer (Android) or iStumbler (Mac) help identify which channels neighbors are using: switch to a less congested one in your router settings. If the signal is simply too weak, Best Home Security Camera: reviews systems with cellular fallback, which ensures you stay connected even if WiFi drops.
Firmware updates: manufacturers release updates for security patches and feature improvements. Enable auto-update in the app if available, or manually check quarterly. A camera running outdated firmware is a liability, it’s vulnerable to exploits that expose your home network.
Permission and code requirements: in most U.S. jurisdictions, a battery-powered camera on your own property requires no permit. But, if your system includes hardwired components or if you’re in a historical district or HOA-controlled area, review local rules. Solid security cameras for home installations follow basic privacy best practices: avoid pointing into neighbors’ windows, and if you’re recording audio, verify your state permits two-party recording consent.
Conclusion
Solar panel security cameras deliver genuine freedom from power limitations and the flexibility to monitor areas you’d never economically wire or perpetually babysit for battery swaps. By matching the solar panel wattage and battery capacity to your climate, choosing a camera with specs suited to your threat model, and placing the system where it gets real sun and solid WiFi, you’ll have a surveillance tool that runs reliably for years. Skip the shortcuts on placement, maintenance, and weatherproofing, that’s where most DIY installs stumble. When you get it right, a solar camera is one of the smartest security investments a homeowner can make.