A 16 camera security system isn’t overkill for serious homeowners, it’s practical coverage. Whether you’re protecting a large property, monitoring multiple entry points, or securing a compound-style home, 16 cameras offer flexibility that smaller systems can’t match. You get full perimeter visibility, interior monitoring for valuables, and redundancy if one camera fails. This guide walks you through choosing, installing, and maintaining a 16 camera security system that actually works.
Table of Contents
ToggleKey Takeaways
- A 16 camera security system eliminates dead zones and provides comprehensive property coverage without redundancy gaps, making it practical for large homes and compound-style properties.
- Choose cameras with at least 1080p resolution, and upgrade to 2K or 4K for accurate face and license plate identification in critical areas.
- PoE (Power over Ethernet) systems simplify installation for hardwired setups, while wireless options offer flexibility but require strong Wi-Fi coverage across your entire property.
- Allocate your 16 cameras strategically: 2 cameras at front entrance, 2–3 at driveway/garage, 2–3 at rear patio, 2–3 at side yards, and 4–6 for interior spaces with valuables.
- Commit to monthly lens cleaning, quarterly motion testing, and annual firmware updates—a 16 camera security system requires regular maintenance or it becomes an expensive, non-functional investment.
- Integrate your camera system with smart locks and window sensors, and explore professional monitoring ($10–$30/month) to turn alerts into immediate police dispatch and potential insurance premium discounts.
Why Choose a 16 Camera Security System
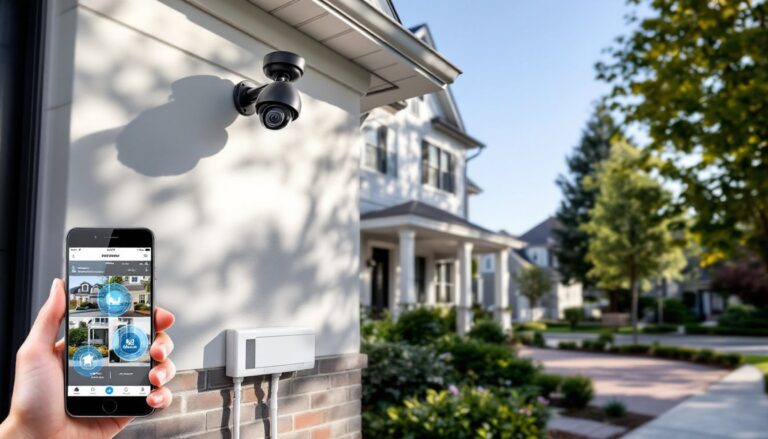
A 16 camera setup gives you something smaller systems can’t deliver: comprehensive coverage without dead zones. Think of it this way, a 4 or 8 camera system might miss the side yard, the back corner, or secondary entrances. With 16 cameras, you’re covering the front, rear, sides, driveway, garage, and interior spaces simultaneously.
This redundancy matters. If one camera fails or gets blocked by weather, you’ve still got 15 others recording. Many homeowners also discover that 16 cameras cost less per camera than 4-camera bundles, so the per-unit price drops significantly. Modern 16 camera kits are designed for both PoE (Power over Ethernet) and wireless hybrid setups, meaning you’re not forced into a single installation method.
Second, deterrence is real. Visible cameras, especially in a 16-unit array, send a clear message to would-be intruders. Best Home Security Camera: highlight how properly placed cameras reduce property crime. Insurance companies also recognize multi-camera systems: some offer modest discounts on homeowner premiums when surveillance is documented.
Assessing Your Home’s Coverage Needs
Before ordering, map your property. Walk the perimeter and identify every entry point: front door, back door, garage, side gates, basement windows, and deck access. Take notes on distance, the further from a camera, the higher the resolution you’ll need to identify a face or license plate.
For a typical residential property, allocate cameras this way:
- Front entrance and porch: 2 cameras (wide angle + close-up)
- Driveway and garage: 2–3 cameras
- Rear patio and back door: 2–3 cameras
- Side yards and fence lines: 2–3 cameras
- Interior (valuables, basement, hallways): 4–6 cameras
- Overflow/future expansion: 2 cameras
Consider lighting too. Dark corners require infrared or high-sensitivity cameras: well-lit areas let you use standard models. Home Security Cameras: The explains how placement and lighting work together to maximize image quality.
Measure cable runs if you’re planning hardwired PoE cameras. Long runs (over 100 feet) may need signal boosters or additional network infrastructure. Wireless systems skip this headache but require strong Wi-Fi coverage across your property, a challenge if your router doesn’t reach the back shed.
Key Features to Look For
Not all 16 camera systems are equal. Here’s what separates reliable setups from frustrating ones:
Resolution & Sensor Size: Look for cameras offering at least 1080p (2MP). For face identification and license plates, push toward 2K (4MP) or 4K (8MP). Bigger sensors gather more light, so nighttime footage isn’t a pixelated mess. Inexpensive 0.3MP cameras are nearly worthless, you can’t identify anyone.
PoE vs. Wireless: PoE (Power over Ethernet) runs both power and data through one Cat6 cable, simplifying installation if runs are reasonable. Wireless systems avoid cable work but demand excellent Wi-Fi and suffer interference from walls or congested 2.4GHz networks. Hybrid systems, mixing PoE and wireless, offer flexibility.
Storage & Backup: A 16 camera system records enormous footage. Systems typically use 4–8TB hard drives (offering 7–30 days of continuous recording depending on resolution). Cloud backup adds security but costs monthly. Check whether your system supports 24/7 continuous recording or motion-triggered recording: continuous uses more storage but catches everything.
Night Vision: Infrared (IR) cameras dominate budget systems: starlight or low-light sensors deliver color at night and cost more. For areas where you need color identification, starlight cameras earn their price.
Reputable product reviews at Good Housekeeping and CNET: Product reviews, advice, how-tos and the latest news test whether cameras actually perform as advertised in real-world conditions.
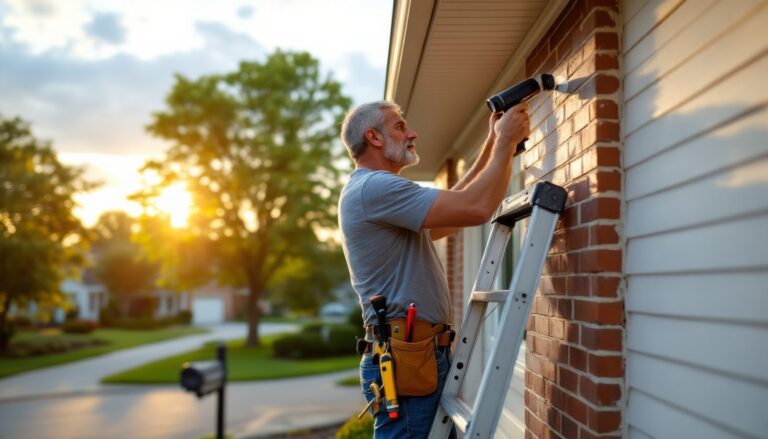
Installation Basics for DIY Homeowners
Before starting: Shut off power at the breaker, wear safety glasses, and use a voltage tester to confirm circuits are de-energized if you’re adding power outlets.
If you’re running PoE cameras, you’ll need:
- Cat6 cable (rated for outdoor/UV exposure if running outside)
- PoE injector or switch
- Drill with a 3/4-inch spade bit for routing cables
- Waterproof conduit for exterior runs
- Camera mounts (typically included)
Starting the install:
- Mount the DVR or NVR (Digital/Network Video Recorder) in a secure, climate-controlled location, usually a closet, garage, or utility room. Ensure it has ventilation: these devices run 24/7.
- Route cables through walls and conduit, avoiding high-voltage lines and areas prone to pinching. Label every cable as you go, 16 cables become a maze fast.
- Mount cameras level and at 8–10 feet high for face visibility. Aim to minimize glare and reflections from windows.
- Connect cameras to the recorder and power (PoE or individual adapters). Test each camera in the system interface before closing walls.
- Configure storage, retention, and alerts in the software. Set motion zones to reduce false alerts from tree branches or passing cars.
For wireless systems, the process is simpler, just mount cameras, connect to your Wi-Fi through an app, and sync to the hub. But, expect weaker signal in dead zones: you may need a mesh network upgrade.
Security System Reviews: Discover provides real-world installation experiences and common pitfalls.
Maintenance and System Monitoring
A 16 camera system demands regular attention, or you’ll end up with recording nothing.
Monthly tasks: Check each camera lens for dust, spider webs, or condensation, wipe gently with a soft, dry microfiber cloth. Verify the system is actively recording by checking the interface: many failures go unnoticed until an incident occurs.
Quarterly tasks: Test motion alerts. Walk past a camera and confirm your phone gets a notification. Review a week of footage to spot blind spots caused by growth or repositioned objects. Check hard drive health in the system settings, newer drives fail without warning.
Annual tasks: Inspect cable connections at the recorder for corrosion, especially in humid climates. Replace weatherstripped seals on outdoor junction boxes. Update firmware if the manufacturer releases patches.
Wi-Fi-based systems need stronger oversight, intermittent connectivity causes silent gaps in recording. If your system drops offline regularly, your Wi-Fi isn’t up to the job: consider adding an access point or upgrading to mesh Wi-Fi.
Store a backup copy of 48 hours of critical footage (entries, high-value areas) on a separate external drive every month. If a theft occurs and your hard drive fails simultaneously, you’ve lost both the incident and proof.
Making Your Investment Count
A 16 camera system is a $1,500–$4,000+ investment depending on resolution, storage, and brand. Maximize its value by integrating it with your broader security posture.
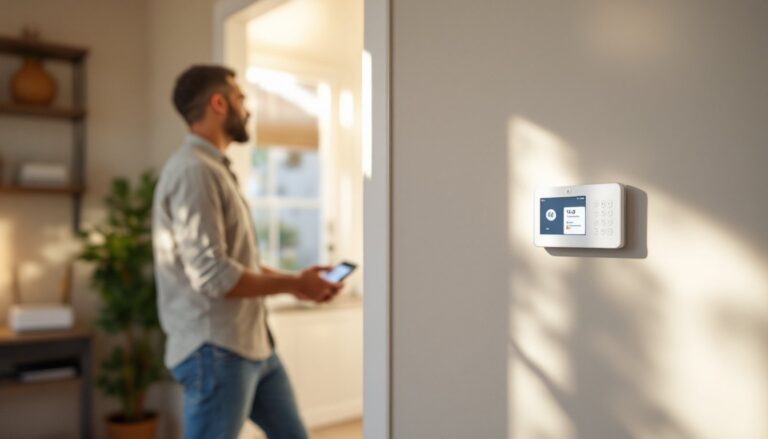
Combine cameras with smart door locks and window sensors. When a camera detects motion at a locked entry, you’ll get alerts in sequence, helping you react faster. Best Home Security System: discusses how layered security beats cameras alone.
Document your system. Take photos of camera placement, serial numbers, and the recorder location. Store login credentials and system diagrams in a secure password manager, not a sticky note on the monitor. If you’re away for extended periods, adjust motion sensitivity to catch any intrusion quickly.
Consider a Home Security Systems: Protect Your Home with Smart Technology Today monitoring service if your budget allows. Professional monitoring costs $10–$30/month but dispatches police immediately on alert, something an app notification can’t do.
Finally, tell your insurance agent about the system. Some carriers offer 5–15% discounts on premiums for hardwired systems with professional monitoring, paying for itself in 2–3 years.
Conclusion
A 16 camera security system delivers the coverage and redundancy serious homeowners need. The investment is substantial, but for large properties, compound layouts, or high-value homes, the peace of mind and tangible crime deterrence are worth it. Start with a clear coverage map, choose cameras that match your lighting conditions, and commit to monthly maintenance. Skip either, and you’ll own an expensive system that nobody, least of all you, is monitoring.